Creating Your First Course
1. Log in to the Course Builder module.
If this is your first login, select Claim OTP and proceed to complete the required steps.
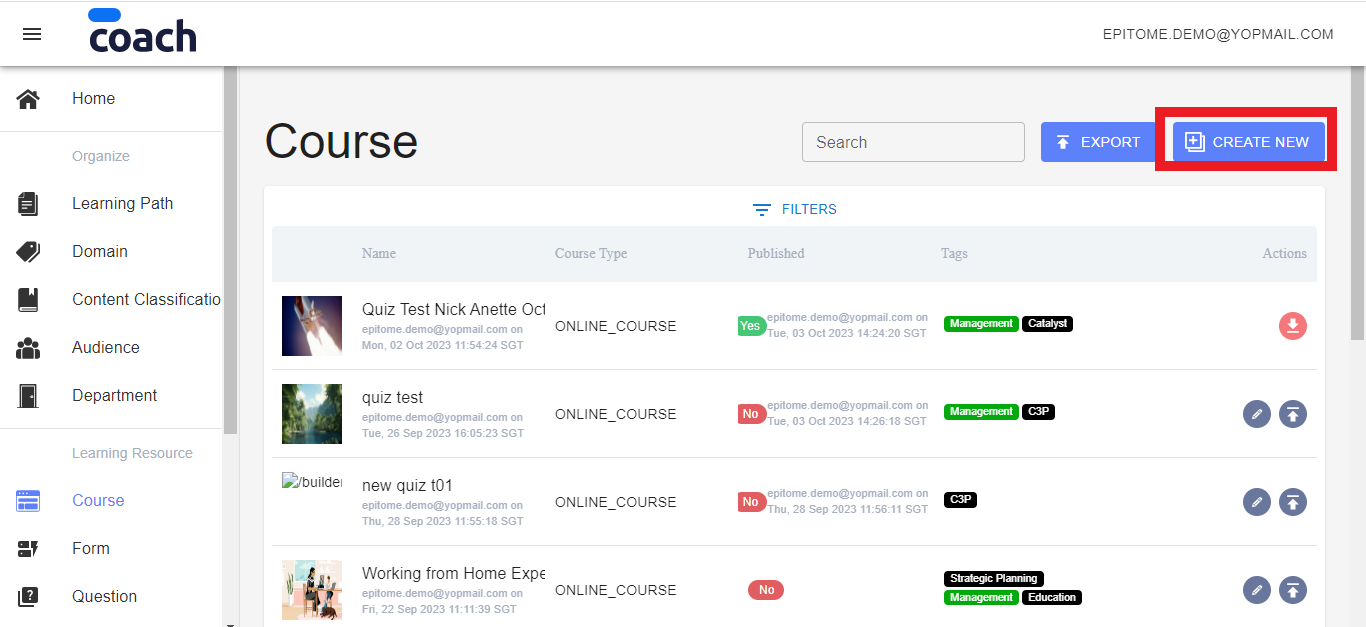
2. On the side menu select Course.
On the Course page select Create New to go to the Create Online Course page.
3. On the Create Online Course page enter Name (mandatory), Description (optional), Duration in minutes (optional), Price (mandatory, the default is 0), set the Reminder (optional), upload the Thumbnail picture (optional) and/or the Trailer Video (optional).

The Course Source is Online Course by default.
Press Save and Continue.
4. You will be taken to the Set Content page.
Use this page to create simple bite-sized content that has no internal lesson structure. If you wish to build a multi-lesson course, select Skip to go to the next page.
On the Set Content page, you can use the menu ribbon provided to
- Enter Text
- Upload Images, PDF documents, Videos, and YouTube videos
- Upload Hyperlinks or Embedded Links
- Upload Email Addresses

Once you are done with setting your desired content, press Save and Continue.
5. You will next be taken to the Tags page.
- If you don’t wish to classify your course content, press Skip.
- On the Tags page, you will see a list of tags available for content classification.
- Tick one or more boxes to the left of the Tag labels to select your course’s primary domain/s.
- The selected tags will appear in the Primary Domain drop-down menu below.
- Unselect a tag if you wish to remove it from the Primary Domain.
- Press Save and Continue.

6. The next page is Lessons where you can upload and organize your course. Lessons are structural units within a Course, and each lesson can contain one or more cards. Content within a single card is displayed on one page. To navigate, learners should use scrolling. If you wish to avoid scrolling as much as possible, split your content between several cards.
To add lessons, press Add Lesson. To add cards within a lesson, press Add Card. You can always preview your lesson display by pressing Preview.

Each Lesson requires a Name that is entered in the field provided. You can also restrict access to a given lesson until the learner completes the preceding lesson(s). If you wish to do so, use the Lock sliding button.
The menu allows you to
- Enter Text
- Upload Images, PDF documents, Videos, YouTube Videos, Audio files, Hyperlinks and Embedded Links, Email addresses
- Insert Quizzes, Polls, and Surveys
- Upload Microsoft Office documents
- Upload entire SCORM and HTML-5 packages
- Insert LTI links
To delete entire lessons, use the red Delete button in the top left corner. To delete individual cards, use the Delete Card button at the bottom of the page. Press Save and Continue to save your course.
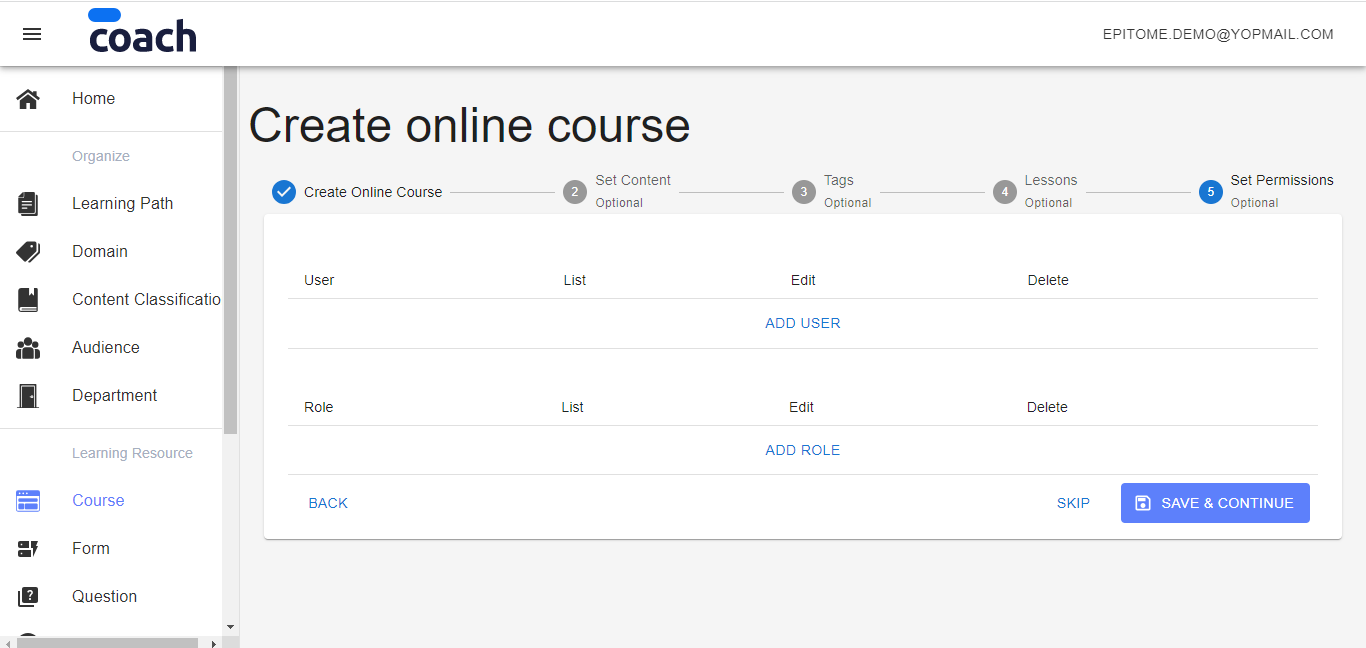
7. You will be directed to the Set Permissions page where you can restrict access to your course to specific learners or learner groups. If you Skip this page, your course will be accessible to all learners.
- Press Add User to see the list of users to choose from. Select the users with whom you wish to share your course.
- Press Add Role if you wish to restrict access to a specific predefined group of users.
- Press Save and Continue to complete creating your course.
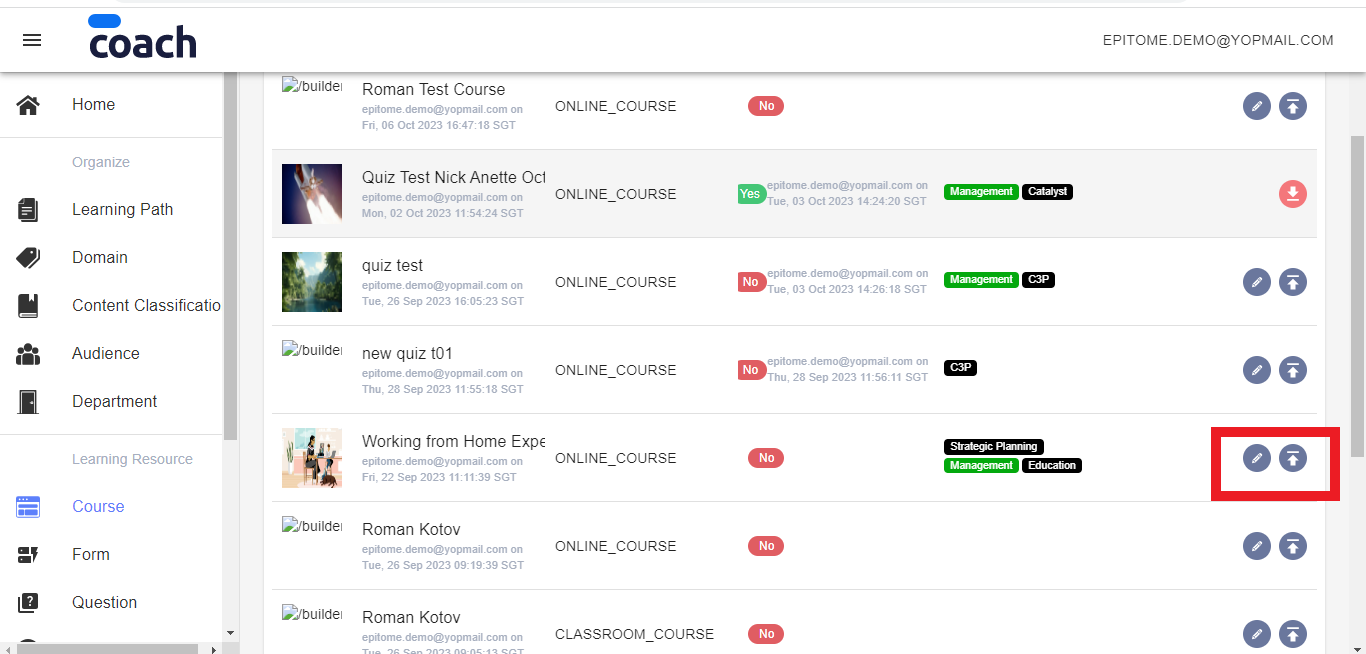
8. You will be taken back to the Course page. Your newly created course will appear on the top of the list. Press the Publish button to publish your course to the users.
Should you wish to edit or delete your course, press the Unpublish button. Once your course is unpublished, you can make changes to it. To put your edited course back online, press the Publish button.
Was this article helpful?
That’s Great!
Thank you for your feedback
Sorry! We couldn't be helpful
Thank you for your feedback
Feedback sent
We appreciate your effort and will try to fix the article